Welcome to the world of coding, students! Web applications evolved to become integral to everyday life, from social media platforms such as Instagram to productivity tools like Google Docs. Some are taking one step further, such as Canva, and with the help of AI, they offer functionalities that were never before available to the general public. And all these web applications keep evolving, creating a world filled with opportunities for those looking to build a career in tech.
That said, creating your own web application might seem scary and overwhelming. But this is only the first impression many young coders go through because it’s a seamless accomplishment with the proper guidance. To help you better prepare for your first web application creation, we did in-depth research into the process and talked to a few tech experts to create this step-by-step guide. With it, you can better understand the process and be prepared to start coding.
Before You Start
If you are not yet comfortable using these languages, there are plenty of online resources that you can use to practice and update your skills. You can also take a look at our Software Development Program that offers modular courses, allowing coders of all skill levels to find their place and work their way through to successful coding career. But more on that another time. For now, let’s keep our focus on the matter at hand – and that’s helping you build your first web app!
Step 1: Idea Generation
Every great application starts with an idea. Think about a problem you’d like to solve or a service you wish existed. The best way to take this step is a brainstorming session. Take the time to think and identify areas of interest or challenges you are passionate about solving. That said, as a beginner, we recommend starting small – a digital clock app, calculator, or notepad can be excellent projects to break the ice with. These simpler ideas provide an ideal starting point for testing your development skills and gaining a deeper understanding of the web application creation process.

While working on the idea, keep in mind the potential users of your app and try to think of how your project can enhance their lives or help them with their work tasks. If you have already used similar apps, think of your personal experience with them and try to identify any missing features or you thought might be more functional if built better. During this process, don’t be afraid to dream big. While you may still not have the needed skills to create a complex app, you can always upgrade it as your skills grow. In this case, every update can serve as a milestone for your growth.
If you don’t know where to start or what features can be built into your first application, go on an exploration run. Test different apps, research their functionalities, and inspire yourself to create a rough idea around your web app. Once you have enough information to start and build a complete concept, you will be ready to move to the next step.
Step 2: Planning
Once you have an idea, it’s time to start planning. The best way to begin with the step is to follow this checklist:
- Create wireframes to outline the basic structure and layout of the user interface.
- Develop high-fidelity mockups to visualize the design, color schemes, and typography.
- Create wireframes or mockups to visualize the layout and structure of the user interface (UI).
- Design the UI components, keeping in mind the overall user experience (UX).

This, in turn, will allow you to see a visual representation of your application and can help you with further planning.
Once you can paint a better picture of the finished application, it’s time to create a detailed project roadmap highlighting the development milestones, deadlines, and dependencies. Once you have the core structure of this plan, break down the project into smaller and easily manageable tasks so that you can seamlessly track your progress and identify any potential challenges as early as possible.
Lastly, consider the value of seeking feedback during the planning phase. Share your mockups and project roadmap with peers or mentors to gain valuable insights and perspectives. Constructive feedback at this stage can help you refine your vision, uncover potential blind spots, and ensure that your development plan is both realistic and achievable.
Step 3: Development Environment
Creating a good development environment is crucial for the next stage of your web application building process. A well-configured environment ensures a seamless and efficient development process, empowering you to bring your web application to life confidently. The specific steps can vary depending on the programming languages, frameworks, and tools you’re using. Below are general steps that cover the basics of setting up a development environment:
Integrated Development Environment
An Integrated Development Environment (IDE) is a comprehensive software suite that combines various tools and features to support the entire software development process. It typically includes a text editor, a compiler or interpreter, a debugger, and other tools for tasks like version control, project management, and debugging. IDEs are designed to provide an all-in-one solution to streamline and enhance the development workflow. Keep in mind that choosing an IDE depends on the programming language used for building the web app. Ensure to do good research which IDE would be most suitable for your project before starting with this step.
Set Up a Version Control System
Integrate a version control system into your workflow to track changes, collaborate with others, and maintain code integrity. Git is a widely adopted version control system with platforms such as GitHub or GitLab providing hosting services. Take the time to set up a repository for your project, commit regularly, and better understand basic Git commands.
Choose a Package Manager
Depending on your chosen technology stack, familiarize yourself with package managers such as npm (Node Package Manager) or pip (Python’s package installer). These tools simplify the process of managing project dependencies, making it easier to integrate third-party libraries or frameworks.
Don’t rush with this step. Take the time to configure each component of your development environment, exploring the settings and customization options available. Getting comfortable with your tools early on will contribute to a more productive development experience. Additionally, consider exploring integrated development environments (IDEs) that may offer additional features and a more streamlined workflow for certain languages or frameworks.
Install Additional Development Tools
Depending on your project, you might need additional tools or extensions. For example, browser developer tools, Postman for API testing, or Docker for containerization. This can vary based on many factors but it’s always good to be prepared for any additional tools you may need to complete this step.
Step 4: Building the Front-End
The best way to start with this step is by building the HTML structure. As you already know, the application’s front-end is what users interact with. That’s why you should be wary of how it would look from their point of view. Moreover, it’s always a bonus if you construct a user interface (UI) that’s visually appealing and functional at the same time. Let’s break down this step together and go through each milestone to understand better what to expect at this point.
Create HTML Structure
Begin by creating the HTML structure of your web application. HTML (HyperText Markup Language) serves as the backbone, defining the layout and content of your application. Establish a clear document structure by organizing sections, headings, paragraphs, and other HTML elements. This foundational step sets the basis for your content, creating a solid foundation for the visual elements to come.
Style the Visuals with CSS
Once the HTML structure is in place, enhance the visual appeal of your application using Cascading Style Sheets (CSS). Style elements, define layouts, and add visual flair to create an aesthetically pleasing design. Consider using CSS frameworks such as Bootstrap or Tailwind CSS to streamline styling and ensure a responsive design that looks good on various devices.
Build Interactivity
Introduce interactivity to your web applications combining JavaScript and advanced frameworks for development such as Angular, React and Vue.js. This powerful combination empowers you to make your application dynamic and more responsive to user actions. Start by implementing basic functionalities and gradually add more complex interactions as needed.
Focus on a Responsive Design
Consider the importance of responsive design to ensure your application looks and functions well across various devices and screen sizes. Make sure to utilize media queries and flexible layouts to create a seamless user experience on both desktop and mobile devices.
Remember, the key to successful front-end development is balancing functionality and aesthetics. Prioritize making your application work as intended before fine-tuning the visual elements. This step lays the groundwork for the overall user experience, and your willingness to iterate and improve will contribute to the success of your web application. Once the front-end is in place, you’ll be ready to tackle the back-end development in the next steps of your journey.
Step 5: Building the Back-End
Now that the front-end is taking shape, it’s time to focus on back-end development. And let’s be real, the back-end is where the true magic happens. This is where all processes power your application, handling server requests, managing databases, and orchestrating the logic that makes everything work seamlessly. Let’s explore the key components of back-end development so that you can better understand what this step requires.
Choose a Programming Language and Web Framework
Select a back–end programming language based on your project’s requirements and your personal expertise. Most common choices include Python, JavaScript (Node.js), Ruby, Java, and PHP. Once you define the programming language that you will use, it’s time to select a back–end web framework. Ensure that the web framework you choose aligns with your chosen programming language. Examples include Django (Python), Express (Node.js), Ruby on Rails (Ruby), Spring (Java) and Laravel (PHP).
Using Node.js or Django for Beginners
Node.js with Express or Django can serve as excellent starting points for those new to back-end development. Node.js, powered by JavaScript, provides seamless and event-driven architecture, making it well-suited for scalable server-side applications. Django, on the other hand, with its “batteries-included” philosophy, simplifies many aspects of back-end development, allowing beginners to focus on building features rather than configuring the setup.
Database Design and Implementation
Establish a database to store and retrieve data essential for your application. Common databases include MySQL, PostgreSQL, or MongoDB. Define the structure of your database, create tables, and build relationships between different data entities. Object-relational mapping (ORM) tools can simplify all database interactions. Popular examples of ORM frameworks and libraries include Hibernate for Java, Entity Framework for .NET, Django ORM for Python, and Sequelize for Node.js. These tools provide an abstraction layer that translates between the object-oriented paradigm used in application code and the relational database model used in database systems.
API Design and Implementation
Start by designing the API (Application Programming Interface) that will enable communication between the front–end and the back–end side of your application. Remember to also implement endpoints for CRUD (Create, Read, Update, Delete) operations and other necessary functionalities to ensure seamless communication.
Middleware and Security Considerations
Develop server-side logic to handle business logic and application functionality. Implement authentication, authorization, and data validation. Handle errors and exceptions gracefully.
Pay careful attention to security considerations, including protecting against common vulnerabilities like SQL injection and cross-site scripting. Security is crucial in the back-end development process to safeguard user data and ensure the creation of a trustworthy application.
As you start with back-end development, we recommend looking at the complexity of the processes with enthusiasm. The magic happens here, where the user interactions connect with the functionalities of your application. Whether you choose Node.js or Django, these technologies provide a solid foundation for your back-end journey. Your web application can enable a seamless and powerful user experience with a well-constructed back-end. The subsequent steps will further refine and optimize your application, bringing you closer to the final product of your first-ever web app development project.
Step 6: Integration
If you reached this step – congratulations! This is a big milestone in your journey. As you advance in the development of your web application, the sixth step involves a crucial process of integration, where the front-end and back-end components seamlessly come together to create a cohesive and functional whole. This step is instrumental in enabling effective communication between different layers of your application. Remember to also integrate API (Application Programming Interface) endpoints for data communication.
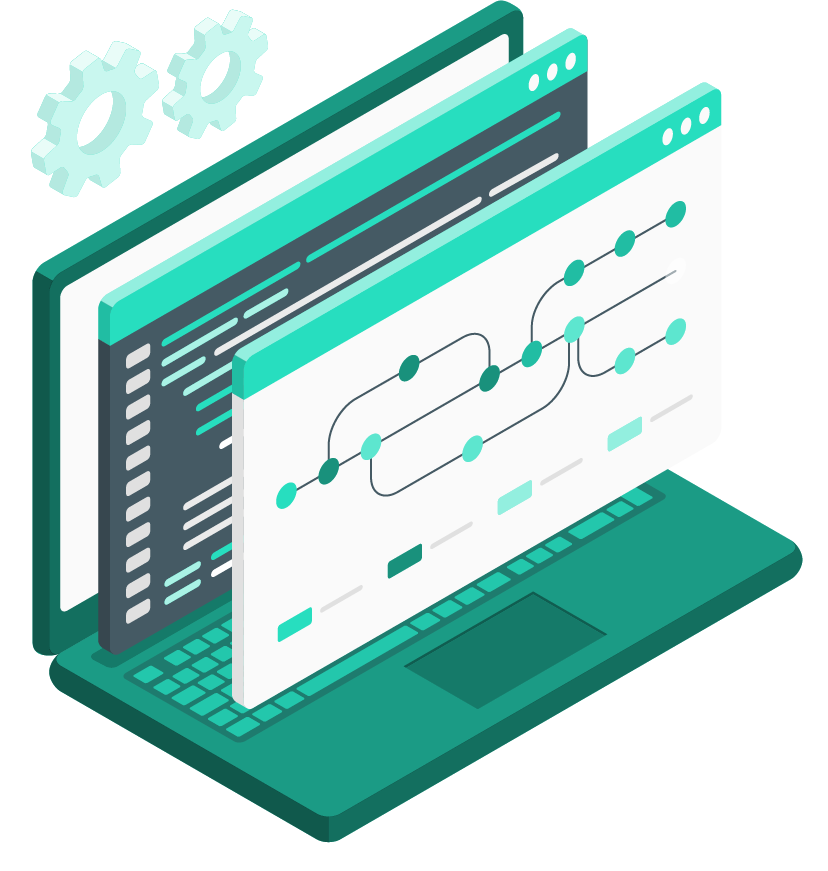
By successfully integrating the front-end and back-end components, you ensure that your web application functions as a unified system, providing users with a seamless and responsive experience. This step bridges the gap between user interactions and server-side operations, setting the up the stage for the final steps of testing, deployment, and ultimately, the launch of your fully functional web application.
Step 7: Testing Your Application
As you move forward in building your first web application, the importance of testing cannot be overstated. Testing serves as a critical checkpoint to ensure that your application functions as intended, providing seamless and reliable user experience. This step involves various types of testing, each serving a specific purpose in validating different aspects of your application’s functionality. Let’s take a look at all these aspects and help you prepare better for the testing phase.
Unit Testing
Start by implementing unit tests to assess the functionality of individual components or functions within your code. Unit tests focus on isolating and verifying the correctness of small, independent units of your application. Tools like Jest for JavaScript or Pytest for Python offer user-friendly frameworks to start with your unit testing journey.
Integration Testing
Beyond individual units, integration testing evaluates how different components of your application work together. This testing type ensures that your application’s various parts integrate seamlessly and function harmoniously. Tools like SuperTest for Node.js or Django’s testing framework for Python can assist in setting up integration tests.
Functional Testing
Functional testing examines the overall functionality of your web application, simulating user interactions to ensure that the application behaves as expected. This type of testing is particularly valuable in identifying issues related to user interfaces, user inputs, and the overall user experience. Selenium and Cypress are popular tools for conducting functional tests in a variety of web development environments.
Automated Testing Tools
You can also consider using automated testing tools to streamline the testing process and enhance efficiency. These tools enable you to run tests automatically, both saving time and ensuring consistent results. In addition to Jest, tools like Mocha, Chai, and Ava are widely used in the JavaScript ecosystem. For Python, frameworks like pytest and Django’s built-in testing tools can also be valuable assets to you.
Performance Testing
Integrate testing into your development workflow by implementing continuous testing practices. Continuous integration (CI) tools such as Jenkins, Travis CI, or GitHub Actions can automatically run tests whenever changes are made to your codebase. This proactive approach helps catch issues early in the development cycle.
Continuous Testing
Assess the performance of your web application by conducting performance testing. Tools such as Lighthouse or Google PageSpeed Insights can help you evaluate factors such as page load times, rendering speed, and overall performance optimization. Ensuring a fast and responsive application contributes significantly to a positive user experience.
User Acceptance Testing (UAT)
Enlist the help of potential users or stakeholders to conduct user acceptance testing. This involves real users interacting with your application to provide feedback on its usability and overall satisfaction. UAT is crucial in refining your application based on genuine user experiences.
Remember, testing is not just about finding bugs. It’s a proactive strategy to ensure the reliability and quality of your web application. By combining various performance testing methods, you create a comprehensive testing suite that significantly reduces the risk of deploying a flawed application. As you make testing a habit, you can create a robust and resilient web application that users can trust and enjoy.
Step 8: Deployment
After thorough testing and refining your app, it’s time to showcase your hard work to the world through the final step – deployment. This crucial phase involves making your web application accessible on the internet, allowing users to interact with it and experience the functionalities you’ve created. Here’s a short but in-depth guide to what to expect from the deployment process:
Choose a Deployment Platform
Select a deployment platform that aligns with your needs and skill level. Platforms like Netlify and Heroku are excellent choices for beginners due to their user-friendly interfaces and seamless integration with popular version control systems such as Git.
Netlify Deployment
Netlify offers a straightforward deployment process. Connect your project repository to Netlify, configure your build settings, and deploy your application with just a few clicks. Netlify provides continuous deployment, automatically updating your application whenever changes are pushed to your repository.
Heroku Deployment
Heroku is another popular platform that simplifies deployment. Create a Heroku account, install the Heroku CLI (Command Line Interface), and follow the step-by-step instructions to deploy your application. Heroku supports various programming languages, making it versatile for different tech stacks.
Domain Configuration
Consider configuring a custom domain for your web application to enhance its professionalism and brand identity. Both Netlify and Heroku allow you to connect a custom domain with your deployed application, providing users with a memorable and easily accessible web address.
SSL Certificate Implementation
Prioritize security by implementing an SSL certificate for your deployed application. SSL ensures that data transmitted between users and your application is encrypted, safeguarding sensitive information. Both Netlify and Heroku offer free SSL certificates, contributing to a secure user experience.
Monitoring and Analytics
Implement monitoring and analytics tools to gain insights into your application’s performance and user behavior. Services such as Google Analytics or Netlify Analytics provide valuable data on user interactions, helping you make informed decisions for future enhancements.
Scaling Considerations
Anticipate potential growth and consider scaling options offered by the deployment platform. Both Netlify and Heroku provide scalability features that allow your application to handle increased traffic and demand. Explore these options as your web application gains popularity.
Continuous Integration/Continuous Deployment
Ensure to have continuous deployment practices to streamline the release process. Set up automatic deployment pipelines that trigger whenever changes are pushed to your version control repository.
Moreover, remember to implement CI/CD pipelines to automate the testing and deployment process. Ensure that changes are automatically tested and deployed when pushed to the version control system. This guarantees that your deployed application is always up-to-date with the latest features and bug fixes.
Documentation and Support
Document the deployment process for future reference and to assist others who may want to contribute to or deploy your project. Leverage the documentation the deployment platforms provide and actively engage with their support communities for assistance.
By successfully deploying your web application, you transform your local project into a live, accessible website that users worldwide can visit. This final step marks the culmination of your journey from ideation to implementation, and it opens the door to user feedback, further iterations, and the potential for your application to make a meaningful impact on the web.
Congratulations on reaching this milestone!
Conclusion
Building your first web application is a journey. It might be challenging, and it may feel overwhelming, but it’s also incredibly rewarding. Each step in the process, from idea generation to deployment, offers a new learning opportunity. So, keep exploring, keep coding, and most importantly, keep having fun.
Additional Resources
Your learning shouldn’t stop here. Websites such as Stack Overflow, GitHub, and MDN Web Docs are great places to find more information, solve doubts, and learn about new advancements. Remember, every coder was once a beginner. With persistence and enthusiasm, you’re well on your way to becoming a proficient web developer.
Happy coding!


